Showing posts with label ball. Show all posts

Friday, September 21, 2012

Turn those Home Grown Tomatoes into Homemade Salsa

Your journey from tomato seed to edible tomato began a few months ago. Now you have so many tomatoes you aren’t sure what to do with all of them. You have given so many to the neighbors that when they see you coming they close their front doors and hide, because they don’t want anymore. Ok, maybe it’s not that bad, but you get the point.

One of the best ways to preserve your tomato harvest is to learn some canning methods. Particularly the water bath canning method. I will get to more on that in a moment. This method allows you to take your tomatoes and safely preserve them for consumption later on. If done correctly, they could last for up to one year.

But if you really want to maximize your time, efforts and tomato harvest, then combine the canning process with pre-made dishes. In other words, before you can your tomatoes, turn them into something first, i.e. tomato sauce, tomato soup, or as is the case with this article, salsa. What you choose is up to you, but it will definitely make things easier later on down the line.

Today I am focusing in on salsa. You can add it to just about anything, or nothing at all and use it as a dip for chips and tortillas. When you make a salsa from your own home grown tomatoes, it really tastes that much better. So let’s begin. 

I would like to say that I am a seasoned chef and conjured up my own salsa recipe, however I did not.  I use a pre-made mix that requires adding nothing more than my own tomatoes and distilled vinegar.

As shown in the picture, I used Mrs. Wages salsa mix.  A nice and easy recipe that anyone with 10 minutes and a working stove can make (and tomatoes of course).

I chose the mild/medium salsa as I am not one that likes things too spicy, however, even that had a bit of a kick to it.  At least to me anyway.

Follow the instructions on the back to prepare the mix.  The only thing you will need to add is vinegar and your tomatoes.  So below I gave a brief example of how to get your tomatoes started.


I used a variety of tomatoes to make up my salsa.  This season I grew beefsteak, romas and cherry.  If you look in the photo you will see a combination of all three, with a bit more romas then the others.

Most people use only romas because they are easy to cut the core out and keep the seeds out of their salsa mix.  The choice is up to you.

To get your tomatoes ready for the salsa mix, you will first need to blanch them.  This makes removing the skins (which you don't want), much much easier.  Blanching is simply the process of putting your tomatoes into boiling water for 45 seconds, then removing them and immediately submerging them into ice water.


Join our leftover seeds mailing list  


Once the blanching process has been completed, move the tomatoes to an area with enough space and start removing the skins by hand.  You should not have to use a knife or any other tool to remove the skins.  Save the knife for the dicing step.  If you do, place the tomato back into the boiling water for a little bit longer.


After you have "skinned" the tomatoes, use a sharp knife to dice them.  Cut the tomatoes into small cubes then place the diced tomatoes into your salsa mix. 

Follow the instructions on the back of the pack, which is bringing the tomato mixture to a boil, then reducing the heat and letting it simmer for 10 minutes.

If you plan on canning your salsa for long term storage, then please read the rest of this article.  If you plan on consuming your salsa within the next few weeks, then you can skip the canning portion and read the part of putting the salsa into canning jars.

If you plan to "can" your salsa
Before you begin the above tomato salsa mix, get your canning supplies ready.  Get your water bath going over high heat to get it to a boil and another large pot on a medium to low heat that you will submerge your jars, lids and bands into to sterilize.

I used pint sized jars and made enough to fill four and a half pints.  I felt using smaller jars made it easier to consume in reasonable sized quantities later on.


Get your other canning tools ready.  They normally consist of a jar grabber, tongs, a magnet, funnel and jar tightener.

Each serve a valuable purpose in the canning process.  If you have never canned before, I recommend that you read, Ball Complete Book of Home Preserving

It is a great source of information on diving into the world of canning and food preservation.


After your mix has finished simmering, use the funnel and a ladle to pour the mixture into one of your canning jars leaving a quarter inch of head space.  That is the space from the top of the jar to the top of the salsa inside the jar.  

Once you have your jars filled and sealed with a lid and band, submerge your filled jars into your boiling water bath.  Once the water returns to a rolling boil, then the clock begins.  Boil your jars for 45 minutes.

After 45 minutes, use your jar grabbers to remove the jars and place them on a cooling rack or towel to let cool.  You will know that your jars properly sealed if you hear them begin to pop.  That can take anywhere from a few minutes to a few hours depending on the contents of the jar.

If you find that your jar did not seal properly you can either try again, or place that jar in the fridge and consume within a couple of weeks.

And that's it!  You now have tasty salsa.


About the Author
Mike Podlesny is the author of Vegetable Gardening for the Average Person: A Guide to Vegetable Gardening for the rest of us. Be sure to join Mike`s vegetable seeds mailing list.


Watch the video below to learn more about Mike`s Seeds of the Month Club:

Friday, August 10, 2012

Turn Your Home Grown Cucumbers into Pickles

Have you ever grown your own cucumbers?  If so, then your next step of progression is to turn all of those wonderfully juicy cucumbers into great tasting pickles.  If you have never grown cucumbers, then this blog post should get you excited to do so, as you will see just how easy it is to turn those home grown cucumbers into great tasting bread & butter pickles.

I will say this.  I don't care what recipe you follow to make pickles, if you do not start with good fruits or veggies, your end product won't matter.  Canning will not make it taste better, only preserve the great taste it has to begin with.

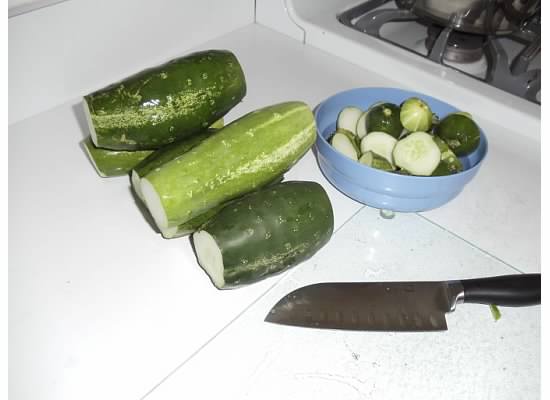
So for this exercise, let's start with some home grown cucumbers.  This year I grew Ashley cucumbers.  They yield plenty to work with and taste great.  Not the most ideal variety for pickling purposes, but adequate none the less.  If you want a great tasting, true pickling cucumber, go with the Boston variety.

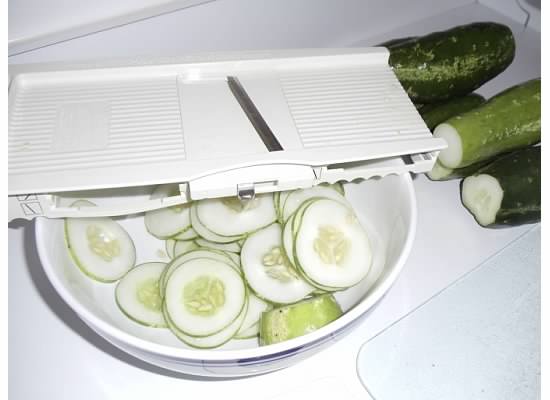
Once you have your cucumbers, slice off the ends as it makes it easier to have a flat surface of the cucumber to work with when using a mandolin slicer.  If you don't have a slicer, not to worry, simply use a sharp knife. 

I would have really liked to slice them with a "crinkle cut", but I did not have that attachment, so I settled for plain old flat.

The slicer I use has a nice feature where it "grips" the bowl that the slices go into.  This made it much easier to slice the cucumbers much faster.

I talked to a few people and they have electric slicers which work fast and well.  Probably a good idea to get one in the future if you plan on pickling loads of cucumbers as my friend does.

However, a simple mandolin slicer will do the trick.

I did not use a homemade recipe as I went the very easy route and used a pre-made mix.  For my pickles I chose Mrs. Wages Bread & Butter Pickles mix.  The recipe for this mix is as easy as it gets. 

You mix the dry ingredients in the pack with sugar and vinegar and then heat it up over the stove so everything will blend together.  Very simple!


Now go ahead and fill your jars.  Do not fill all the way to the top as you need to leave some room for head space.  

I filled mine up to just about where the jar starts forming into the mouth.

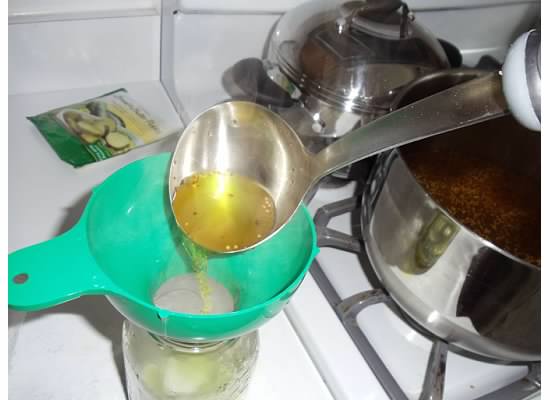
I also used my canning funnel to make sure none of the residue of the pickles touched the tops of the jar.  While not catastrophic if it does, it makes cleaning easier.
Now that your jars are filled with cucumbers, using a ladle, start pouring the hot pickling mixture into your jars.  Definitely use your funnel for this step.  

Fill the jars with the liquid leaving about a 1/4" of head space.  That is a 1/4" of space from the top of the jar where the lid will sit.

Once the jar is filled, make sure you remove as much air from between the cucumbers as possible by sliding a butter knife (or some other non sharp object) down inside the jar, moving the cucumbers off the side.

You can use the hot water bath method for this process.  I explain the hot water bath method, here, for tomatoes.  The process is the same.

The back of the mix packet will tell you exactly how long to heat this up for, which will be 35 to 45 minutes, depending on where you live as your locations altitude makes a difference.

And that's it!  Great tasting bread & butter pickles, made from cucumbers, right out of your garden.  Once you make these, and see how easy it is to do, you will never want to buy pickles from the store again.

About the Author 
Mike Podlesny is the author of Vegetable Gardening for the Average Person: A Guide to Vegetable Gardening for the rest of us, the moderator for the largest vegetable gardening page on Facebook and creator of the monthly Seeds Club.

Watch the video below to learn more about Mike`s Seeds of the Month Club:

Friday, August 3, 2012

How to Can your Home Grown Tomatoes

Growing your own food is a thrill.  You will feel a tremendous sense of accomplishment.  Whether you start from seed or get some plants from a local nursery, when you take a bite out of that first home grown tomato, you will never want to eat a store bought one again.

But what happens when gardening season ends?  This is where storage comes into play.  I recently wrote a few articles on basic storing methods, but in this article I want to give you specific steps to "can" those home grown tomatoes using the water bath method.


The canning items you will need are the following:
  • Some canning jars.  These are available for about $9 to $14 per dozen, depending on the size.  They come in pints and quarts as well as wide mouth and narrow mouth.  For this article, I am using quart sized jars with narrow mouths.
  • Jar bands and lids.  These usually come with the jars, however the lids are not reusable.  I'll get to more on that in a moment.
  • Some utensils.  These will include a lid grabber, which is nothing more than a stick with a magnet on it, a jar grabber, and a funnel.
  • You will need a large pot that is deep enough to put the jars in and have at least one inch of water on the top.  Many places sell a pot/utensil combination kit for $30 to $50.
Items that you will need that you may have around your house already, but will need:


  • Lemon Juice
  • Salt (optional)
  • Tablespoon
  • Teaspoon
  • 2 pots, 1 for hotwater, 1 for ice water
  • Tongs to grab the tomatoes
  • A ladle for the hot water you will add to the jar


For this article I chose roma tomatoes that I grew in my garden.  The steps are the same for any tomato, but the romas are perfect for marinara sauce.  I like my beefsteak tomatoes for salsa.  I'll save that for a seperate article.

Be sure to join Mike`s vegetable seeds mailing list


STEP 1 - Peel the Tomatoes
While you don't absolutely have to remove the skins, your tomatoes will taste much better later on when you go to use them.


The simple way to remove the skins is through the blanching process.  Bring a pot of water to a boil.  Once the water is boiling, drop your tomatoes into the pot for 45 seconds.  You will see the skins on the tomatoes start to crack and seperate.
After 45 seconds, start removing the tomatoes with your tongs and immediately plunge them into another pot filled with ice water.


Now you are ready to start peeling the tomatoes.  There is no real science to this.  Just use your fingers and hands, and start peeling away.  I like to keep a bowl nearby to throw the peels into.  I will then throw those peels into my compost bin.  Nothing goes to waste!  Or at least I try to make sure nothing goes to waste.


STEP 2 - Add Some Ingredients

To your empty jar, add two tablespoons of lemon juice and 1 teaspoon of salt.  The salt is optional.  Meanwhile, before you get to the next step, get a pot of water going on the stove.  You will add the hot water to your jar in a later step, but you need this for the liquid to add to your lemon juice.  Some recipes I have read said make sure it is boiling, while others said it only needs to be hot.  I just heated mine up.  Never brought it to a boil and it works fine for me.

STEP 3 - Put the Tomatoes in your Jar
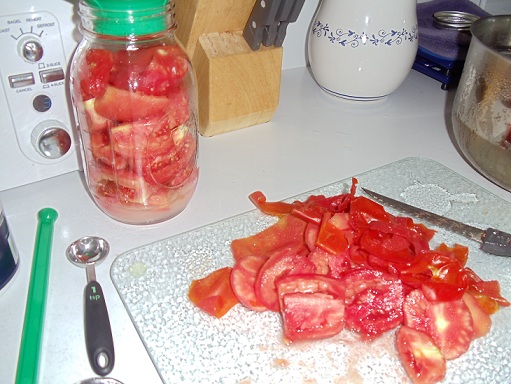
How you can your tomatoes is up to you.  Some people like to can them whole, while me personally I cut them in half.  The choice is yours and the process is still the same.


Using your funnel (which helps keep tomato residue off the lids and sides of the jar), start putting your tomatoes in your jar until the jar is filled.  Make sure you take up as much space as possible.  DO NOT FILL ALL THE WAY TO THE TOP.  Leave about 1/4" of head space (space between the top of the tomatoes and the top of the jar.
STEP 5 - Add hot water
Take a large spoon or ladle and start taking water from your pot of hot water (from step 2), and slowly add it to your jar of tomatoes.  In between each ladle of water, use a butter knife or a spoon and gently slide it down the inside sides of the jar to help release any air trapped between the tomatoes.  Fill the jar with hot water leaving a 1/4" of head space.

STEP 6 - Add your jar to the water bath

Place your jar of tomatoes in your large pot of hot water.  As you can see in the picture, the pot that I am using comes with a basket with handles which makes it easier to put many jars on and then lower the basket into the hot water.  It also allows for space underneath the jars inside the pot as well.


STEP 6 - Remove the Jars


Pints will need to be in the hot water for 35 minutes, quarts for 45 minutes.  If you live in areas of higher elevation you should add another 10 to 15 minutes.Once the the time has elapsed, use your handy jar grabbing tongs, and remove the jars from the hot water bath and place them on a cooling rack. 

Leave the jars there to cool for 12 to 24 hours.  You will hear a "pop" sound when it completely seals.  This usually occurs within the first few hours.  If after 12 hours you did not hear the pop, or you can easily push the center of the lid of the jar in and out, then it means the jar did not seal properly.

I have read you have up to 24 hours to attempt to reseal, however at that point I simply just consume the contents of the jar within 3 days since I try and do all of my canning in a single day.  I'd hate to start all over again for a single jar.  The choice is yours.

And that's it!  Store away in a cooland dry location out of the way of any sunlight.  Basements work best for this.


About the Author Mike Podlesny is the author of Vegetable Gardening for the Average Person: A Guide to Vegetable Gardening for the rest of us, the moderator for the largest vegetable gardening page on Facebook and creator of the monthly Seeds Club.

Watch the video below to learn more about Mike`s Seeds of the Month Club: