Thursday, September 29, 2011

Bee Keeping, Is it for you?


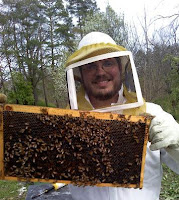
Patrick seen here with a hive and beesA few months ago I was watching an episode of House Hunters on HGTV. Ok, my wife was watching it, but I was in the room. In any event, one of the three houses the couple were looking into purchasing was situated next door to a neighbor that had beehives, of the neighbor’s own doing, in their backyard. I was thinking to myself, `who in their right mind would move in next to a house with bees?!?`. To my shock, that is the house the couple chose and in exchange for the couple’s “allowance” of the neighbor to have bees, the neighbor gave them honey anytime they asked for it.

Don’t get me wrong I don’t dislike bees. As a home vegetable gardener I completely understand their tremendous importance in the pollination process. It just seemed odd to me to raise bees in my backyard.

So instead of writing off the idea of raising bees as some notion of environmental craziness, I researched the topic further to find out the answers to the who,what,where,when and why’s. What I found out through various articles, magazines and newscasts (you can see loads of videos on YouTube), bee keeping is extremely popular.

Aaron Warner, a high school science teacher has been bee keeping for 8 years. Aaron recommends before you even get started, to read at least 3 books, preferably recently written within the last 10 years, on the topic. This will give you a tremendous amount of information to make informed decisions.

“Start with two hives if possible purchasing nucs of bees rather than packages of bees,” says Aaron, and ”Be prepared to receive conflicting information when you ask beekeepers how to ..... It's not rocket science. Most mistakes are small and very fixable.” I will explain what a “nuc” is in a moment.

It sounds fairly simple, but what are the three best tips a seasoned bee keeper can give you if you want to get into the hobbby? I turned to Patrick Freivald, the vice president of the Ontario-Finger Lakes Beekeeping Association (ontariocountybeekeepers.org) and a large hobbyist beekeeper with a roadside stand in Canadice, New York. Here are three tips that Patrick recommends to follow.

Find a group
Beekeeping organizations can be found all over the world, and interest in beekeeping is very high. While asking three bee keepers a question will often as not garner four conflicting answers, nothing beats the helping hand of an interested and dedicated mentor. Mentorship, beekeeping classes, and deals on bees and equipment are just a few of the benefits of joining a local group, and membership is almost always free. From mites to bears to nervous neighbors to marketing honey, your local group of bee keepers will have answers to all of your questions, concerns, and problems.

Read
Just as Aaron suggested, there are fantastic books out there, Kim Flottum's Backyard Beekeeper, Ross Conrad's Natural Beekeeping, and Beekeeping for Dummies by Howland Blackiston are just three of the dozens of excellent guides for the aspiring apiarist (a person who studies or keeps bees). If you can find them, anything by the late Richard Taylor is excellent. Bee Culture Magazine and the American Bee Journal are both excellent sources of information for beekeepers, whether for new hobbyists or long-time commercial bee keepers.

Equipment
Buy only new equipment from reputable companies such as Mann Lake, Dadant, Brushy Mountain, or Bee Commerce. Old equipment can harbor diseases such as American Foulbrood, which is devastating to any bees in the area, can remain dormant and undetected for decades on old equipment. Foulbrood can spread quickly and most states require foulbrood-infected bees and equipment to be burned -- disheartening and expensive for the new bee keeper, and not likely to win friends amongst his beekeeping neighbors. Be safe; buy new.
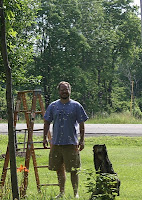
Patrick standing in a swarm of his beesSo what can you expect from a bee harvest and how quick is the production time? According Patrick, “Beekeepers should not expect a honey harvest their first year, because the bees will spend much of their effort building comb (though that doesn't mean they won't get one! Two new bee keepers I am mentoring this year got over 60 lbs of honey on each of their brand new colonies, though this kind of first-year performance is quite rare.) After the comb is drawn, the honey harvest varies depending on location, weather, and the particulars of each colony of bees. My personal experience has ranged from no extra honey, as a lot must be left behind for the bees to survive the winter months, to over 100 lbs of surplus from a single colony. My average for the past few years has been around 35 lbs of honey per colony per year in rural Western New York State.”

With all of this bee keeping information in hand you are ready to get started right? Well not so fast, Patrick recommends you take a class on bee keeping as most fees charged for taking the class will also include a “nuc”, short for nucleus colony of bees. Expect to pay about $100 for the course (and bees) but be prepared for the additional costs that most newbies don’t think about which include, woodware, a suit and veil, smoker, and a hive tool, although they are one time costs (or at least should be).

About the Author
Mike Podlesny is the owner of Mike the Gardener Enterprises, LLC, the exclusive home for the Seeds of the Month Club, which has appeared on NBC, ABC and MSN Money as a great way for consumers to save money.

Watch the video below to learn more about the Seeds of the Month Club:

Tuesday, September 27, 2011

Add Some Grapes to your Home Vegetable Garden

Every year I try to add something new to my vegetable gardening experience. Whether it is building a new raised bed, growing a different variety of fruit, vegetable or herb, I am huge fan that expanding one’s vegetable gardening knowledge will go a long way to a more successful garden.

Over the past three years I have made a conscience effort to add a new fruit. Three years ago I made an attempt at raspberries which did not pan out very well so I will put them back on the growing block for next season. However the one fruit that seems to be doing well are my grapes.

Be sure to join Mike`s vegetable seeds mailing list


I purchased two different varieties at the end of last season on closeout at a local home and garden center for a buck a piece. This season they really took off. The vines have grown thick and healthy and have taken over the trellis that I set up for them. The questions that popped into my own head were “what do I do now?” Do I trim it back? If so, when? Should I expand my trellis and did I even plant the correct variety to begin with? I mean, after all I made a huge investment of a dollar (ok it’s not that huge).

When it comes to growing grapes where else would you to turn for expert advice then someone who grows them for a living. John G. Kramb of Adams County Winery in Orrtana, PA, started producing wine from grapes in 1998. Today they produce over 30,000 gallons of wine from their 15 acres worth of grapes they grow on their farm.

According to Mr. Kramb, the biggest challenge someone can face in growing grapes, “is finding a grape variety that that will grow in their region. Some grapes, like vinifera, will not do well in cold climates. Some grapes, like American varieties, will grow anywhere.”

I asked Mr. Kramb what he would recommend as a good grape variety to grow and he said, “It all depends on what the grower is going to do with the grapes once they are producing a crop. If they want to make wine at home, they need to grow a variety which will produce a wine that the grower knows he/she enjoys. If they are growing table grapes, they probably want a seedless variety like Thomson.”

As of right now in my second year with the grape vines I purchased I have not reaped any fruits of my labor so to speak. Mr. Kramb says that is normal. He doesn’t expect any significant production until after the third year. In fact if the grape vine does produce any fruit prior to the third year that fruit is removed so the plant can develop a stronger root system.

As far as pruning the vine is concerned, he said you should wait until all of the leaves have fallen off and if you live in a colder climate wait until the spring to make sure your plant has not experienced any winter damage.

On a final note, when in doubt check with your local agricultural extension agent to get advice on varieties that should grow well in your area and don’t forget to ask commercial growers in your area to see what they do to get some advice from them. But above all, be patient. Good quality grapes takes a few seasons.

About the Author
Mike Podlesny is the owner of Mike the Gardener Enterprises, LLC, the exclusive home for the Seeds of the Month Club, which has appeared on NBC, ABC and MSN Money as a great way for consumers to save money.


Watch the video below to learn more about the Seeds of the Month Club:

Thursday, September 22, 2011

Extend Vegetable Gardening Season with a Cold Frame


Many of us live in climates where the weather changes from hot to cold in a matter of days. We are the unfortunate many that can not grow peppers and tomatoes year round, but with cold frame gardening we can extend our season through the cold winter months with great tasting lettuce greens, kale, spinach, chard and broccoli to name a few.

A cold frame is a way to protect what you are growing from the harsh cold winds that old man winter blows in. At the same time it allows plenty of sunlight to get in, and if designed correctly will give your plants plenty of air through proper ventilation.

There are a number of websites and gardening centers that sell cold frames. They range from the inexpensive to the “very” expensive. I find, however, the most rewarding cold frame is one that you can build yourself.

Roger Marshall, author of the book How to Build Your Own Greenhouse, agrees.

Roger does his gardening in Rhode Island, and having been in the great Ocean State myself during a winter a few years ago, I know it can get very cold there. In the coldest of winter months of January and February, Roger has grown various greens and broccoli in a cold frame he built himself out of some old storm windows.

Here are photos of Roger`s cold frame:


He recommends a number of ways you can build easy to use cold frames, such as using straw and hay bales as well as using a side of a wall of your house. You simply use these items to form a garden bed. Just be sure to cover with some clear plastic to let the light in but keep the cold out yet easy enough to open up for daytime ventilation.

What about watering methods and other tips to make cold frame gardening a success? According to Jana Vanderhaar of Verdant Connections Landscape Architecture, “Water your veggies by hand, and don’t forget to open the cold frame during the day for ventilation and close again in the evening.” He continues on, “We grow many lettuce varieties, kale, chard, arugula, bok choi, tat soi, parsley, green onions, cilantro, and mache. The greens taste best once a frost has passed, because the nutrient density is increased. Yum!”

If you were thinking about hanging up your gardening gloves for the winter, think again. Cold frame gardening is a great way to keep going. Use some of these tips above to create your own cold frame and have a winter garden for yourself.

About the Author
Mike Podlesny is the owner of Mike the Gardener Enterprises, LLC, the exclusive home for the Seeds of the Month Club, which has appeared on NBC, ABC and MSN Money as a great way for consumers to save money.

Watch the video below to learn more about the Seeds of the Month Club:

Tuesday, September 20, 2011

What is Listeria and How do you protect yourself


Last month experts confirmed nine cases of Listeria in the state of Colorado. First indications point the outbreaks to have occurred from infected cantaloupe, although one family member of an infected person claims it had to be the salmon she ate. Officials are still gathering information as to its cause, but as of right now, cantaloupe seems to be the culprit.

With that said, what is listeria and how do we improve our chances of not being infected by it?

“Listeria is a bacterium that causes listeriosis, a disease that usually causes flu-like symptoms, muscle aches, fever etc.”, says Biomedical Sciences Editor Dr. Kara Rogers. “It can also affect the heart and produce symptoms of meningitis, including headache, confusion, and stiff neck.”

In the recent cases that have occurred in Colorado it has been the cause of individuals lapsing into a coma up through two reported deaths. According to Dr. Rogers an outbreak in Canada a few years ago caused a mortality rate of 40% of those infected.

The transmission of this bacterium usually occurs through contaminated foods such as meat and unpasteurized dairy products. Dr. Rogers says it is rarely found on produce which makes the recent outbreak in Colorado involving cantaloupe so unusual.

You can take steps to reduce your chances of infection. Make sure you wash your produce thoroughly and just as important, dry your produce. Any and all meats should be cooked thoroughly as well and the consumption of unpasteurized dairy products should be completely avoided.

“As far as cantaloupe is concerned, it should be washed and dried and either eaten right away or stored in a refrigerator. Proper refrigeration, with temperatures 40 degrees Fahrenheit or lower, is important for preventing the growth of Listeria,” says Dr. Rogers.

About the Author
Mike Podlesny is the owner of Mike the Gardener Enterprises, LLC, the exclusive home for the Seeds of the Month Club, which has appeared on NBC, ABC and MSN Money as a great way for consumers to save money. A special thank you to Orly Telisman, the Director of Media relations for the Encyclopedia Britanica, for the contributions to this article.


Watch the video below to learn more about the Seeds of the Month Club:

Thursday, September 15, 2011

4 Ways to Piss Off Rabbits with a Vegetable Garden


In your neck of the woods you may never see a rabbit. Your fuzzy vegetable garden predator may be a deer or woodchuck, but here in the good ole Garden State of New Jersey where I grow my vegetables, rabbits are the pain in the rear of choice. Or should I say, not really of choice, but forced upon me.

My kids absolutely love them and from a non-gardener point of view they are cute, look cuddly and lets face it, they are harmless. When was the last time you heard on the news about a killer rabbit wiping out a family of four or a crazy wild rabbit runs loose through Chicago, causing chaos and millions in property damage?

However, as cute and harmless as they are, they would just eat the `bejesus` out of my vegetable garden if I did not take the necessary steps to keep them out. Over the past 10 years I have come up with a simple way to do just that, which I will get to that in a moment, but what I have also come up with are great ways to really piss them off, or so I think.

Fence the Garden
Ok this is an obvious one and for 10 years it has worked for me. I use poultry fencing and make sure the height of the fence is no less than twelve inches. For some reason in the back of my mind I have this notion that the rabbits can leap like deer, so I don`t take any chances. God forbid they get a hold of some genetically modified clover on my neighbor’s lawn, I would be in trouble.

Close to the Fence
I love this one. I know that the rabbits absolutely love to feed on my tomato plants, lettuce, peas, beans, well, ok, pretty anything I plant. I found this out the hard way when I first moved into my house. We didn’t have rabbits in Trenton, where I am originally from, so it never occurred to me that I would need a fence. Needless to say the rabbits had a field day. I think they put on 10 pounds that day. What I do now is, after the fence goes up, I plant items near the fence as a tease. Try as they might to stretch and stick their noses through the poultry fencing, they can’t quite seem to get at my plants.

Vining Plants
I am still bumbed that I missed out on this one not having my video camera with me that day. But I had some cantaloupe growing in one of my garden beds last year and the vine made it’s way along the top of the poultry fencing. I woke up one morning to find a rabbit, trying with all its might, literally standing up as tall as it could to try and get the leaves from the vine. Tried and tried he might, he never succeeded. So now I make it a point with my vining plants to do this every year and one of these days I will have that camera with me so I can post the video on Facebook for the world to see, well, at least all of the members of the vegetable gardening page anyway.

My Dog
Finally, last, but not least, my faithful man’s best friend, my dog Bear. He is as loyal as they come. Follows me everywhere, barks when a stranger walks by the house, really barks when a strange dog walks by the house, but, beyond all that, he despises rabbits. Although he has never caught one, try as he will, I do my best to at least let him give it a go. When a rabbit is out in our back yard and he can see it through our sliding glass back door he whimpers and cries as to tell me, “Please, please, please, let me go chase him. I swear I can get him this time.” So I open the door, out Bear goes, and the rabbit scampers away. He has only been close once in the five years since Bear has been a part of our family, and when I say close, I mean I had a better chance of catching the rabbit then he did.

Ok so I know what the rabbit lovers are saying as they read this article, `How Cruel!`. So let me add this disclaimer, no rabbits were harmed in the making of this article...only my vegetable garden.

About the Author
Mike Podlesny is the owner of Mike the Gardener Enterprises, LLC, the exclusive home for the Seeds of the Month Club, which has appeared on NBC, ABC and MSN Money as a great way for consumers to save money.


Watch the video below to learn more about the Seeds of the Month Club:

Tuesday, September 13, 2011

Three Ideas to Vegetable Garden with Limited Space

One of the best things about growing your own vegetables is the freedom you get when it comes to picking and choosing exactly what you want to grow and how much of it you need or want. However, for some, as is the case with those that live in apartments and condos, space is a major factor. With limited space, many people believe you can’t grow what you want or anything at all. Here are some ideas to consider if you fall within this category.

Pots
This is the obvious choice, yet it can be overlooked. Many vegetables can be grown in pots of which the most common is tomatoes. Use large pots. I like to use ones that are at least 12 inches deep as well as 12 inches around. This gives the plants plenty of room to spread out their roots.

Raise Bed
A pot is really nothing more than a raised bed for a single plant. However, even if you have a concrete patio or slab you can turn a portion of that into a raised bed. Build a four foot by four foot by twelve inch deep raised bed out of some wood you can pick up at your local home center. Even better, find a construction site that is throwing away wood and save some money. Fill the raised bed with a mixture of equal parts, vermiculite, peat moss and compost and you will have everything you need to grow a nice little garden. You can just sit the raised bed right on top of the concrete slab.

Community Garden
Maybe you live on the wrong side of the apartment building and you get very little sun. But, the complex itself has some unused land. Ask the apartment owner if you can turn that unused land into a nice garden. You may want to ask some fellow tenants or condo owners if they want to get in on this idea with you. You can even look for a piece of vacant land in the city that you live in. Many towns like Detroit Michigan and Los Angeles California encourage gardening activities to reduce the eye sores of vacant land that gathers garbage. You are helping your town as well as yourself.

Do not let the lack of space prohibit you from growing your own fruits and vegetables. These are three of the many options that you can consider to take advantage of the space you never knew you had.

About the Author
Michael C. Podlesny is the administrator for the largest Vegetable Gardening page on Facebook

Monday, September 12, 2011

Friday, September 9, 2011

Canning Vegetables from Your Garden


Every year when the spring vegetable gardening season rolls around my wife always tells me to tone down the amount that we grow. Not because we do not have the room or that we take away space from the kids play area, but because we end up with so many fruits and vegetables that even after donating them to a local food pantry and giving them away to friends, neighbors and family, we always have way too much.

I can not disagree with her assessments. By mid July we do have a lot. But come December I would love nothing more than to eat a tomato from my garden. Unfortunately here in NJ we are unable to grow tomatoes due to the cold. That is where canning comes in.

My grandmother was an expert in canning. Unfortunately I did not get a chance to learn her skill set so to me canning is still fairly new but I am finding that it is easy. To get a better understanding of canning, I turned to canning expert Linda Amendt.

Linda is an award winning cookbook author and also the winner of the international book awards for canning and preserving. So who better to get the dirt (or jar in this case) on canning.

Canning is the process of preserving vegetables in jars. You place the vegetables in jars specifically designed for home canning and cover them with liquid. The jars used, I will get into in a moment where you get these jars, are then fitted with a special two-piece closure consisting of a canning lid and a screw band.

A piece of equipment that Linda says you will need is a pressure canner. This helps create a vacuum inside the jar and tightly seals the lid. This process helps make the jars of vegetables safe for shelf storage. As a side note, Linda says, “A pressure canner should not be confused with a pressure cooker. They are not the same piece of equipment and are not interchangeable. A pressure canner is specifically designed for home canning and has a gauge that allows you to monitor and adjust the amount of pressure inside the canner to ensure safe canning.”

According to Linda canning is an easy skill to learn. Just follow a few basic safety rules and techniques and you can create an array of preserves from summer produce to enjoy throughout the winter and into the spring months.

I asked Linda where does she find the supplies needed to properly can vegetables grown in one`s garden. She says that beyond the normal tools most people have in their kitchens currently, such as a cutting board and knives, the canning supplies such as jars, lids and screw bands can be found at most grocery stores, Walmart, Target and Kitchen stores, as well as online through website like Amazon.

One final note on canning. Canned vegetables are at their best when used within one year. In that time that is when they will have the best flavor, color and texture. After that, although they will be safe to eat (so as long as they are well sealed), the flavor and appearance will begin to deteriorate.

Be sure to store your canned foods in a cool, dark, dry location. Heat can cause the seals to fail which could cause the food inside the jars to spoil. Also, exposure to light will cause colors to fade and moisture can cause rust on the lids.

About the Author
Mike Podlesny is the owner of Mike the Gardener Enterprises, LLC, the exclusive home for the Seeds of the Month Club, which has appeared on NBC, ABC and MSN Money as a great way for consumers to save money.


Watch the video below to learn more about the Seeds of the Month Club:

Wednesday, September 7, 2011

Falling into Autumn


With beets, spinach, turnips and other crops done, it’s time to think about what’s next. Indeed, one of the joys of gardening is understanding the seasonal evolution. Many of us can’t wait to get in the garden in the spring – admittedly, long winters in Western New York make me long for the soil.

The most productive garden has a progression. For example, those areas where I’ve harvested can be replanted with fall crops, but only after being kind to the soil. For an 8-foot row, I work in about 15-pounds of rotted cow manure and the same of compost. Other areas need to sit tight
until spring.

Its good to work on the premise that adding organic matter is the answer to most soil concerns.
Cornell Cooperative Extension volunteers offer soil testing at farm markets on a regular basis.

Usually analysis is free. Take full advantage. Gardening is a continual experiment. Some things go well, others not so much. Try some companion planting. For example, a fast crop like spinach, once established, will tolerate broccoli nearby. As the spinach finishes, the broccoli will begin to take over. As late summer stays cool and turns to fall, that broccoli will yield. And if they don’t grow forth and prosper as we evolve into fall, that’s OK. Learn from it. This is an experiment, four more packages of seeds will be in the mail next month.

It’s also time to plant the new garlic crop. I rotate garlic to different areas of the garden, depending on the year, but it is the easiest and most rewarding crop in the garden. Start with hard neck garlic cloves, preferably from your area. Look for a variety like Rocombole, Polish White, German Red or Russian at a farm stand. Avoid the stuff from the grocery store. Work in good helpings of manure and compost and plant one clove at a time, 6-8 inches apart, anytime between now and early November.

You will see beautiful plants in early spring and it may be the easiest thing you have ever grown.


Joe Genco is a contributing writer and financial advisor. You can contact him at joegenco@gmail.com.


Watch the video below to learn more about the Seeds of the Month Club: