
 Growing your own food is a thrill. You will feel a tremendous sense of accomplishment. Whether you start from seed or get some plants from a local nursery, when you take a bite out of that first home grown tomato, you will never want to eat a store bought one again.
The canning items you will need are the following:
- Some canning jars. These are available for about $9 to $14 per dozen, depending on the size. They come in pints and quarts as well as wide mouth and narrow mouth. For this article, I am using quart sized jars with narrow mouths.
- Jar bands and lids. These usually come with the jars, however the lids are not reusable. I'll get to more on that in a moment.
- Some utensils. These will include a lid grabber, which is nothing more than a stick with a magnet on it, a jar grabber, and a funnel.
- You will need a large pot that is deep enough to put the jars in and have at least one inch of water on the top. Many places sell a pot/utensil combination kit for $30 to $50.
- Lemon Juice
- Salt (optional)
- Tablespoon
- Teaspoon
- 2 pots, 1 for hotwater, 1 for ice water
- Tongs to grab the tomatoes
- A ladle for the hot water you will add to the jar
For this article I chose roma tomatoes that I grew in my garden. The steps are the same for any tomato, but the romas are perfect for marinara sauce. I like my beefsteak tomatoes for salsa. I'll save that for a seperate article.
Be sure to join Mike`s vegetable seeds mailing list
STEP 1 - Peel the Tomatoes
While you don't absolutely have to remove the skins, your tomatoes will taste much better later on when you go to use them.
 The simple way to remove the skins is through the blanching process. Bring a pot of water to a boil. Once the water is boiling, drop your tomatoes into the pot for 45 seconds. You will see the skins on the tomatoes start to crack and seperate.
 After 45 seconds, start removing the tomatoes with your tongs and immediately plunge them into another pot filled with ice water.
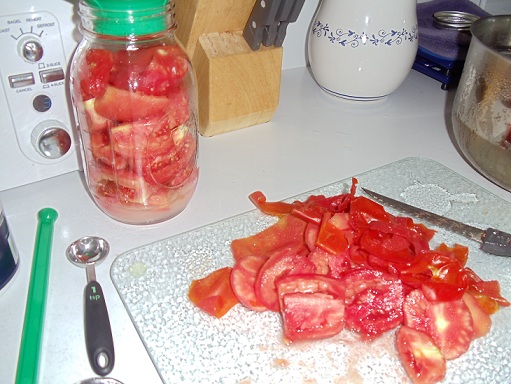
Now you are ready to start peeling the tomatoes. There is no real science to this. Just use your fingers and hands, and start peeling away. I like to keep a bowl nearby to throw the peels into. I will then throw those peels into my compost bin. Nothing goes to waste! Or at least I try to make sure nothing goes to waste.
STEP 2 - Add Some Ingredients
 To your empty jar, add two tablespoons of lemon juice and 1 teaspoon of salt. The salt is optional. Meanwhile, before you get to the next step, get a pot of water going on the stove. You will add the hot water to your jar in a later step, but you need this for the liquid to add to your lemon juice. Some recipes I have read said make sure it is boiling, while others said it only needs to be hot. I just heated mine up. Never brought it to a boil and it works fine for me.
STEP 3 - Put the Tomatoes in your Jar
How you can your tomatoes is up to you. Some people like to can them whole, while me personally I cut them in half. The choice is yours and the process is still the same.

Using your funnel (which helps keep tomato residue off the lids and sides of the jar), start putting your tomatoes in your jar until the jar is filled. Make sure you take up as much space as possible. DO NOT FILL ALL THE WAY TO THE TOP. Leave about 1/4" of head space (space between the top of the tomatoes and the top of the jar.
STEP 5 - Add hot water
Take a large spoon or ladle and start taking water from your pot of hot water (from step 2), and slowly add it to your jar of tomatoes. In between each ladle of water, use a butter knife or a spoon and gently slide it down the inside sides of the jar to help release any air trapped between the tomatoes. Fill the jar with hot water leaving a 1/4" of head space.
STEP 6 - Add your jar to the water bath

STEP 6 - Remove the Jars


Pints will need to be in the hot water for 35 minutes, quarts for 45 minutes. If you live in areas of higher elevation you should add another 10 to 15 minutes.Once the the time has elapsed, use your handy jar grabbing tongs, and remove the jars from the hot water bath and place them on a cooling rack.
I have read you have up to 24 hours to attempt to reseal, however at that point I simply just consume the contents of the jar within 3 days since I try and do all of my canning in a single day. I'd hate to start all over again for a single jar. The choice is yours.
And that's it! Store away in a cooland dry location out of the way of any sunlight. Basements work best for this.
About the Author Mike Podlesny is the author of Vegetable Gardening for the Average Person: A Guide to Vegetable Gardening for the rest of us, the moderator for the largest vegetable gardening page on Facebook and creator of the monthly Seeds Club.
| Watch the video below to learn more about Mike`s Seeds of the Month Club: |
No comments:
Post a Comment